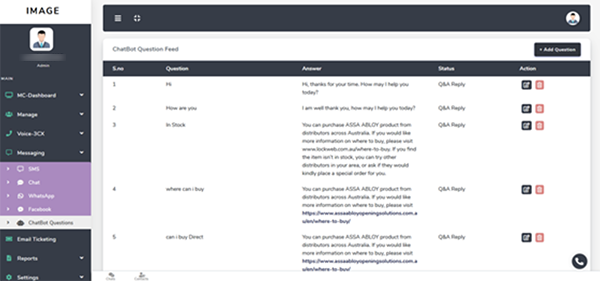
Email Ticketing
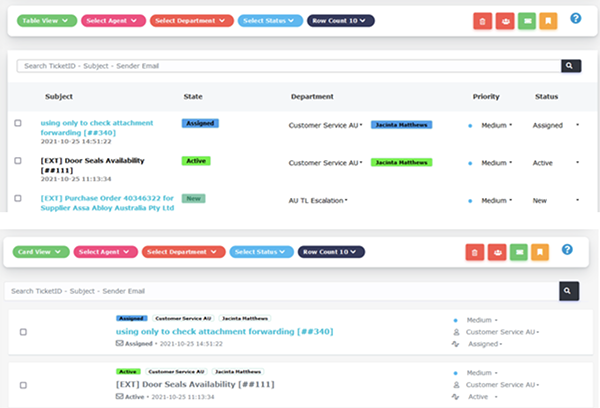
- Changing view (Standard/ Card)
- Filter (by date/ duration)
- Ticket Quick Access
Email Ticketing – Change View
There are 2 types of view: Standard and Card. You can change the view based on preference.
Standard View
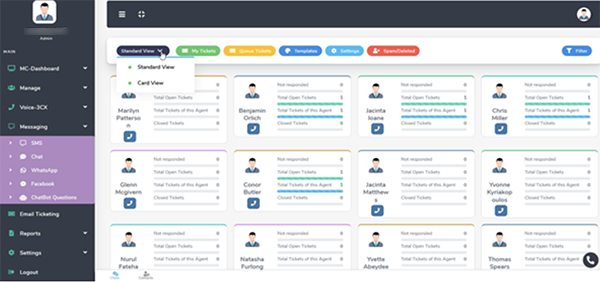
Standard view shows all tickets (Not respond, Open/ Closed/ Total tickets) of individuals within the active month.
Card View

Card view displays the statistic summaries of the month. The point system is based on the number of tickets resolved by agent vs time.
Email Ticketing – Filtering (Date Range)
You can do filtering either by Department, Status, or both.
Filter by Period/ Duration
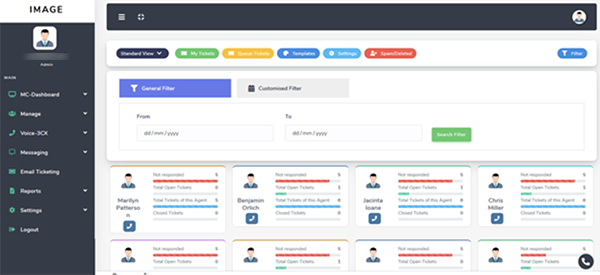
Admins can filter by dedicated period. General filter performs date selection.
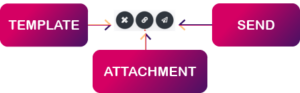
Ticket Quick Access
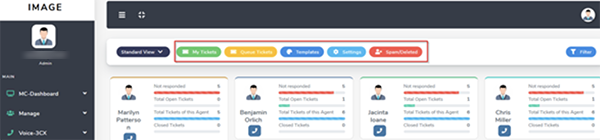
My Tickets – Ticket(s) that are assigned to you. All tickets are considered “My Tickets” for Admin users.
Queue Tickets – New ticket(s) that are in the queue which have not yet been assigned.
Templates – Auto respond email templates. Use when “New Ticket received”, “Ticket Assigned” or “Ticket Closed”. All email content can be pre-loaded into the template.
Settings – Email Ticketing related configuration. (Email alerts – group & individual, Forward listing, SMTP configuration, Email strategy, Email Blocking and Priority flags)
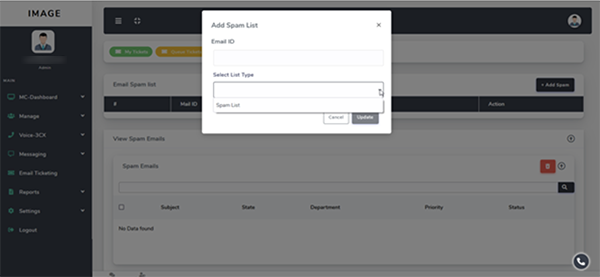
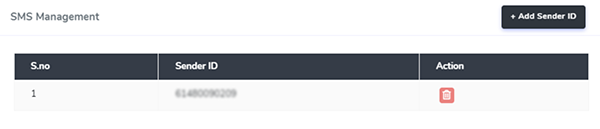
To add the email address as spam, simply enter the email address and select Spam List. Click update to confirm the changes. Email ID added in blacklist will not be accepted in ticketing system.

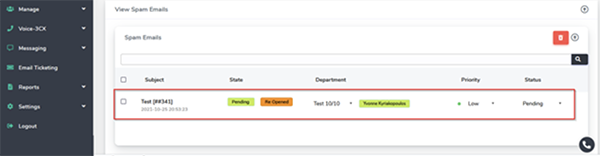
View the Spam Emails by clicking the 
To delete the spam emails, click on the 
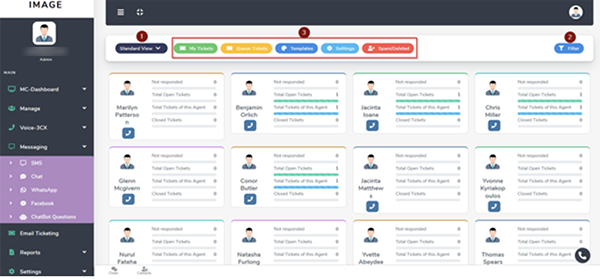
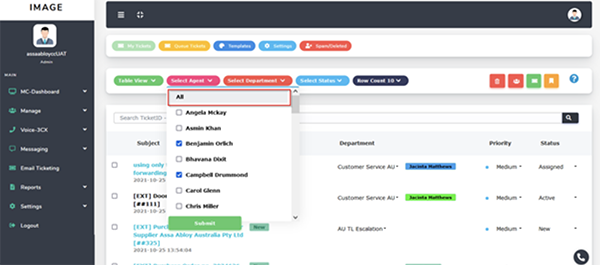
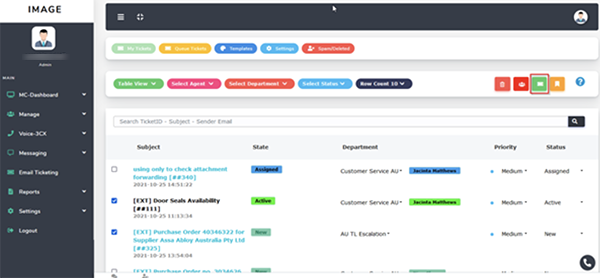
Ticket Criteria Filtering (My Tickets & Queue Tickets)
My Ticket

Queue Ticket

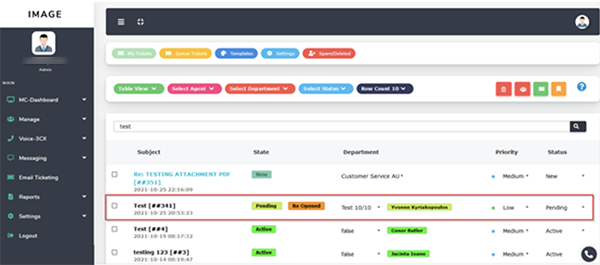
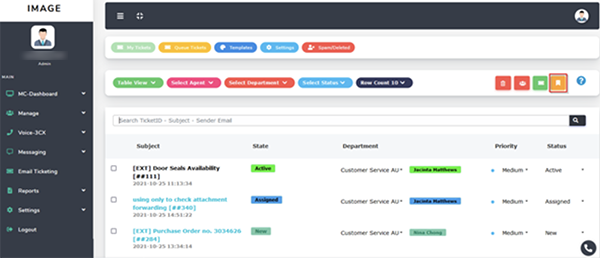
Both “My Tickets” and “Queue Tickets” having similarity in filter function: View, Department and Change Row Count. Admin are the owner of all the tickets, hence the account can performed extended filters by “Agents” and “Status”.
Table View and Card View
How the filter works
Select the Department, Agent or Status that you would like to show in the portal. Example:
Scenario 1: Agent 1 and Agent 5 with the status of “Closed”. (Select Agent Names, then select ticket status “Closed”)
Scenario 2: Department Sales with Status of “New”. (Select Sales and Technical in Department, then select “New” in ticket status)
Scenario 3: All tickets with status “Progress”. (Only select “Progress” in ticket status)
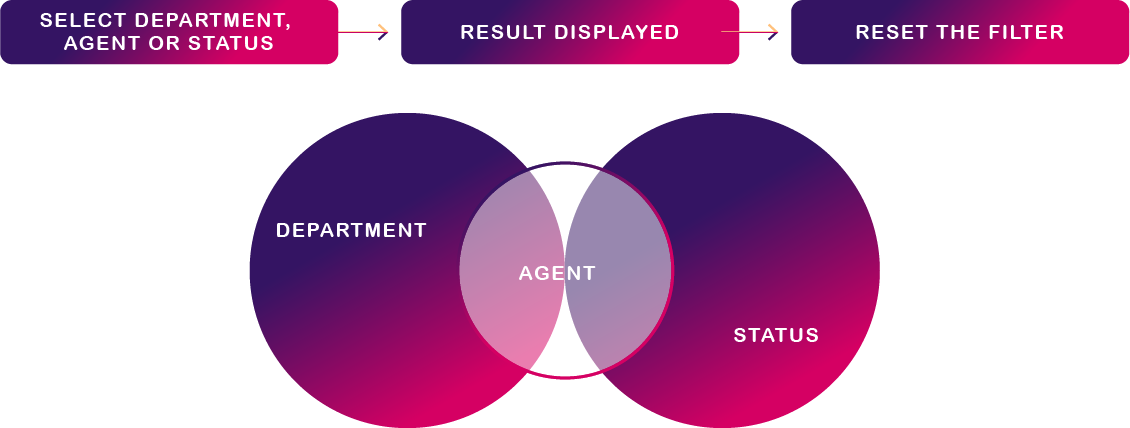
There is a subset rule applied: Status -> Department -> Agent. Status is always the main set-in filter criteria, followed by department, and finally agent.
Filter by Department

The department filter allows you to select one department at a time. From the drop-down select the department to be filtered.
Filter by Status
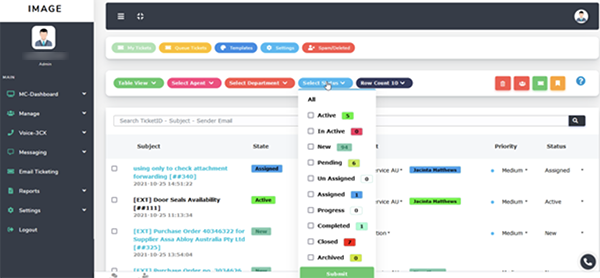
Status filtering allows for multiple selections.
- Click on the Status filter for the drop-down menu.
- Click the checkbox for selection.
- Click Submit to confirm the selection.
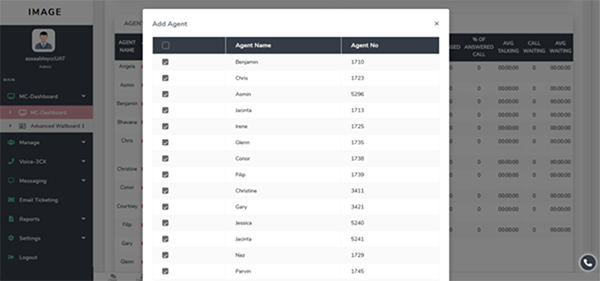
Filter by Agent
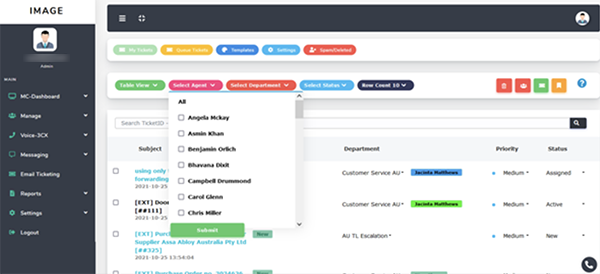
Agent filtering allows multiple selections. If you apply the agent and department filters, ensure that the agent is a member of the department.
- Click on the Agent filter for drop down menu.
- Click the checkbox for selection.
- Click Submit to confirm the selection.
Reset Filter

When no filter is applied, you will see the filter buttons displayed as” Select Agent”, “Select Department” and “Select Status”.
Drop the filter and select “All” to reset the filters.
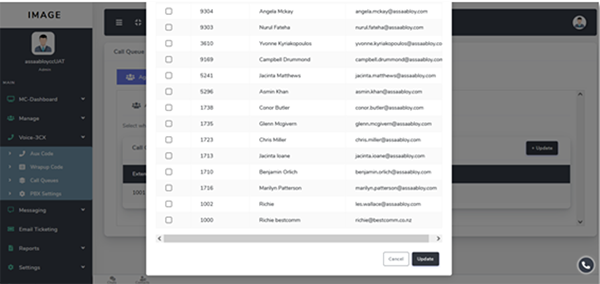
Email Ticketing – Assign Ticket (Single or Bulk)
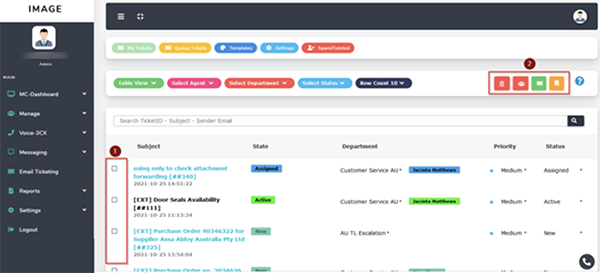
- Click the checkbox to select ticket. (Multiple selection is possible)
- Click on the assign button
 .
. - A pop-up will appear from which you must choose the department to assign to.
Completed, Closed and Archived tickets cannot be assigned.
Email Ticketing – Create Ticket
Any request via another communication channel, can be created as a ticket in the system.
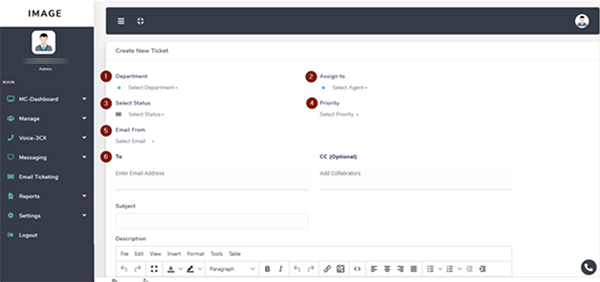
- Department the ticket is being assigned to – Mandatory
- Status of the ticket. (Active, Pending, etc) – Mandatory
- Email used to send to the recipients (Source of the email) – Mandatory
- Agent to be assigned.
- Priority status. (Urgent, Medium, etc) – Mandatory
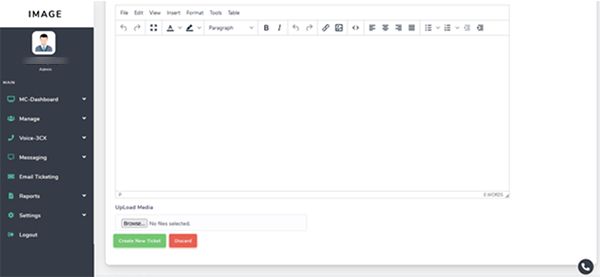
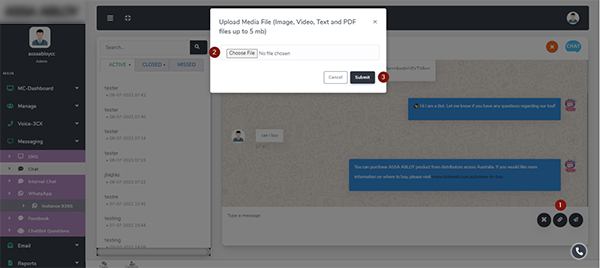
The ticket request (Description and details) can be drafted in here. You can attach files by clicking the “Choose Files” button. Once completed, click “Create New Ticket”.
Click on Email Ticketing, and the ticket can be found in the queue.
If you receive a bounce mail in the email ticketing queue, resend the email.
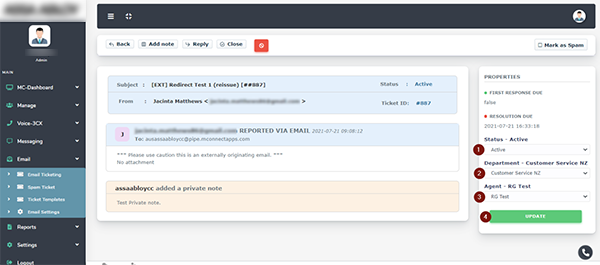
Email Ticketing – Update Ticket
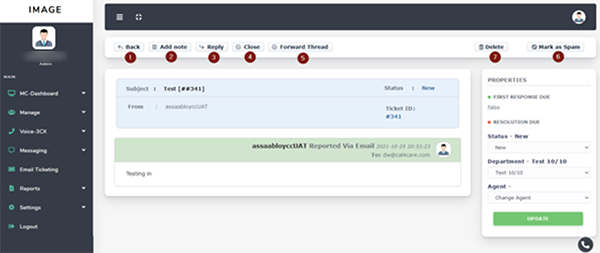
- Back: Return to Email Ticketing Page.
- Add note: Add a comment to the ticket, for internal view (Private note).
- Reply: make a comment to the ticket, an email will be sent to the recipient.
- Close: Closing the ticket. (Issue resolved or duplication)
- Forward Thread: If escalation is required, you can forward the email to others. Simply enter the email address of the recipient(s).
- Mark as Spam: If this email is not for the purpose of support (Advertisement, etc)
- Delete: You may delete the ticket with caution.
Add Private Note
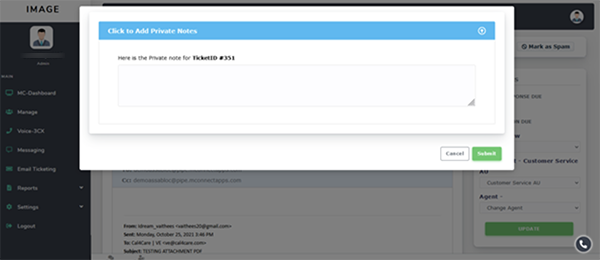
Adding a comment to the ticket for internal use only.
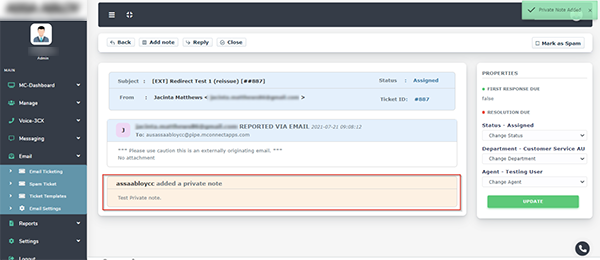
The note is displayed as a private note beneath the message thread.
Re-Opened Ticket
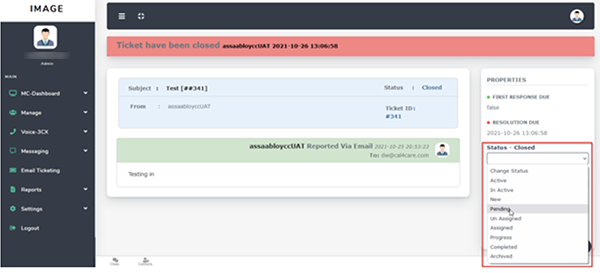
A closed ticket can re-open by changing its status.
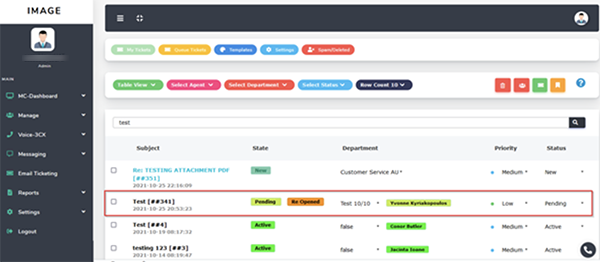
In table view, the re-opened ticket will be marked as “Re-Opened” next to the status of the ticket.
When the ticket is opened the re-opened  icon will be displayed.
Update Ticket – Others
Click on a ticket to open it. A ticket can be updated as follows:
- Status: Change status or close ticket.
- Department: Assign the ticket to another department.
- Agent: Re-assign to another agent (ensure the correct department is selected).
- Update: Confirm the changes.
Spam Ticket
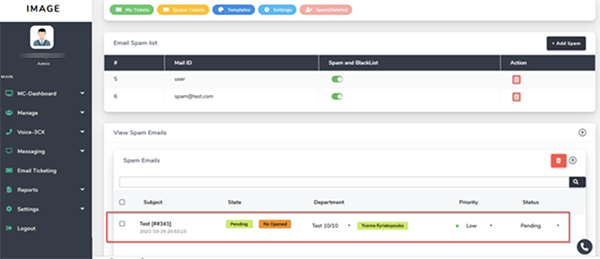
When an agent/ user marks a ticket as spam it will be moved to the “Spam Ticket” folder. To block an email from the system the “+Add Spam” action is required.
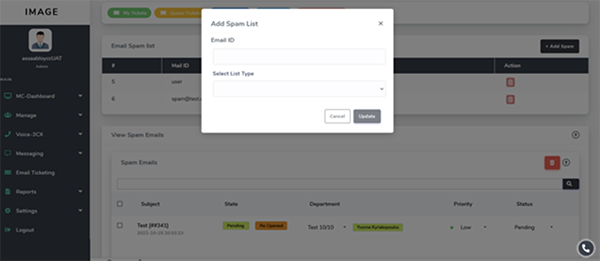
Input the email address (Email ID) and select List Type (Spam List).
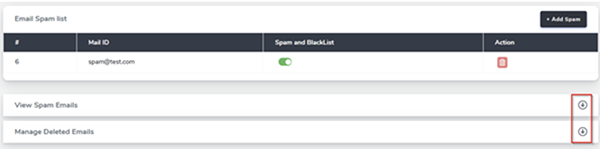
Click on the delete icon to unblock the email.
Mark as Not Spam
Click on the email to open the thread.
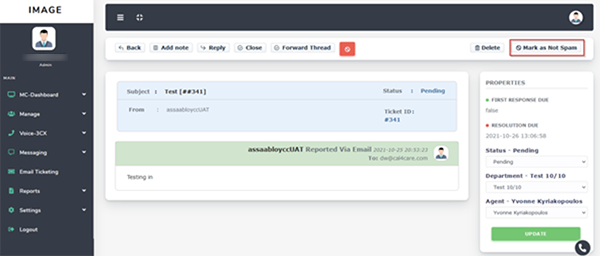
To recover a spam email, click on “Mark as Not Spam”. It will be moved to the Ticketing system.
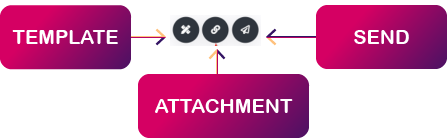
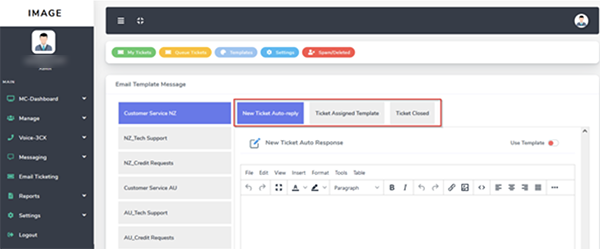
Ticket Templates
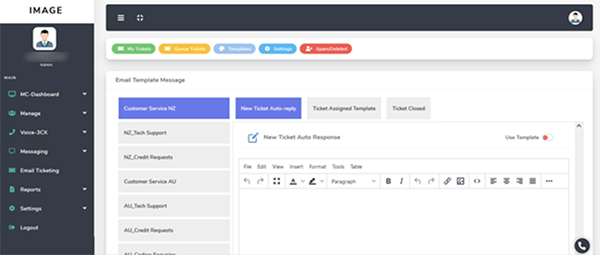
New Ticket Auto-reply: Trigger when the email is received.
Ticket Assigned Template: Trigger when the ticket is assigned.
Ticket Closed: Trigger when the ticket is closed by an agent or admin.
Templates can be customized based on each department. You may edit the content of the templates, but not create new templates. You can switch the template on/off from the right top corner using the toggle “Use Template”.
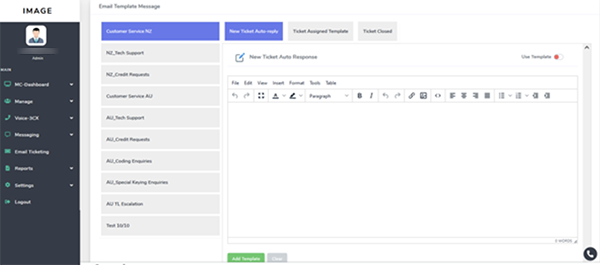
Click Add Template, and it will overwrite the existing template, or Discard to ignore the changes.
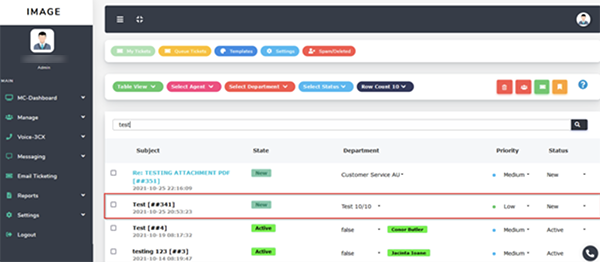
Email Ticketing – Search
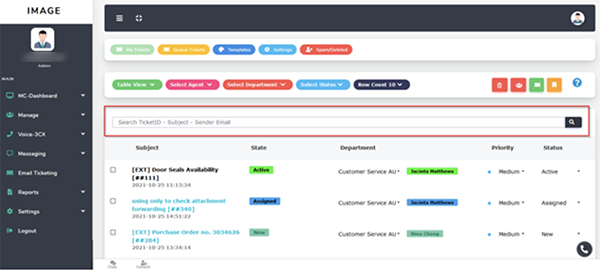
Search for a ticket by ID, Subject or the Sender Email address using the search bar.
Email Ticketing – Signature
Creating or updating a signature is done by clicking on this  icon on the top right corner of the email ticketing page.
Adding a Signature
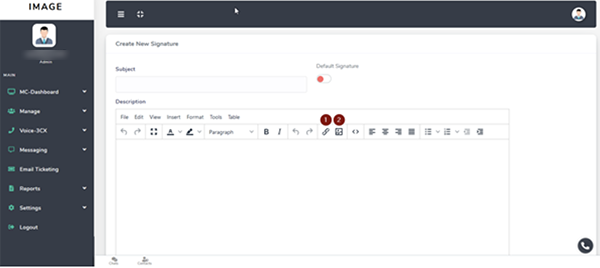
Enter the signature information and click “Add Signature”. The signature will be saved as a template.
- Add a link to the signature.
- Add an image to the signature.
Change default Signature
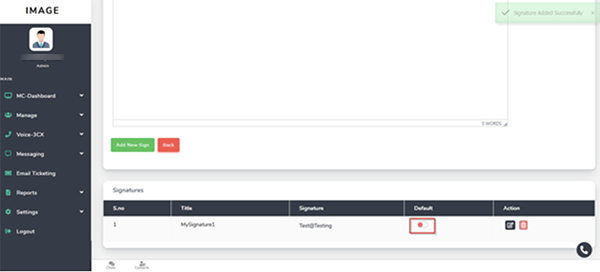
Method 1: Click 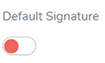 during the signature creation.
Method 2: Scroll down to see all signatures, select and click
Edit Signature Template

- Click on the edit button on the right of the signature.
- Update the signature’s content.
- Click “Update Signature”.
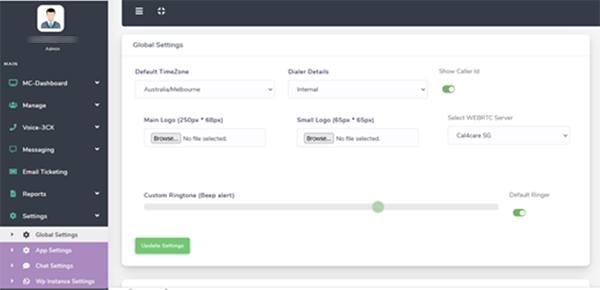
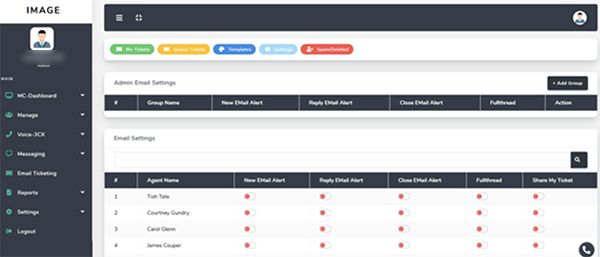
Email Settings
a. Email Alert
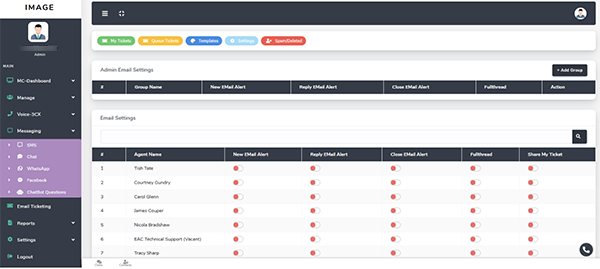
- New Email Alert: alert email for new incoming tickets/emails.
- Reply Email Alert: alert email for outbound replies to tickets.
- Close Email Alert: alert when a ticket is closed.
- Full thread Alert: alert when any form of communication (inbound or out) occurs to a ticket.
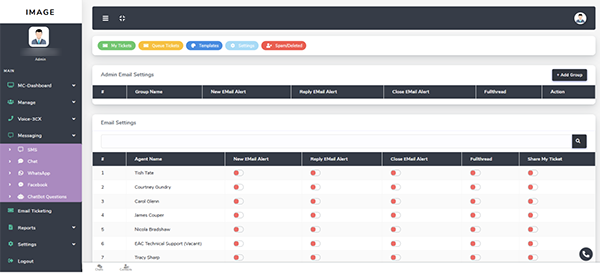
Group & Agent: Configure the email address(es) of the ticket alert recipients.
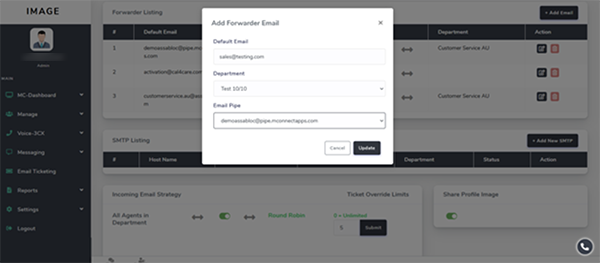
b. Email Forwarding
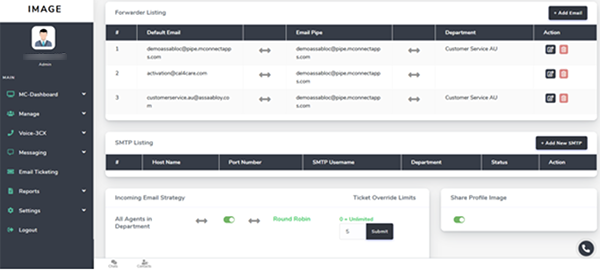
Manage the forwarding email for a specific department.
Configure additional SMTP settings.
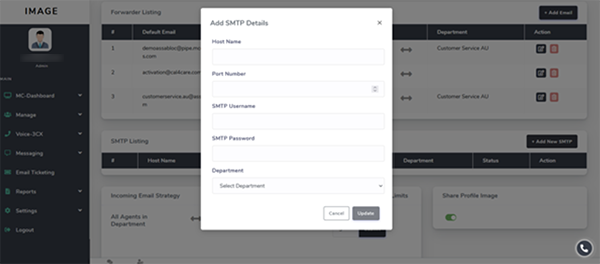
System allows multiple SMTP accounts to be configured. Click “Add New SMTP” to configure.
Email Strategy
Define how an incoming email should be handled. (Broadcast or Round Robin)
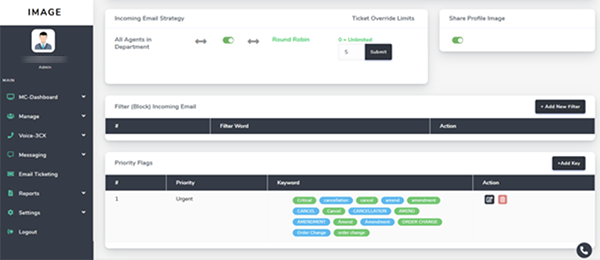

Switching on the round robin strategy, will result in the email being assigned to agents using the round robin method. You can define the number of tickets override limit.
Share Profile Image
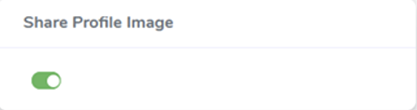
This option sets the same profile image to all agents.
Filter (Block) Incoming Email
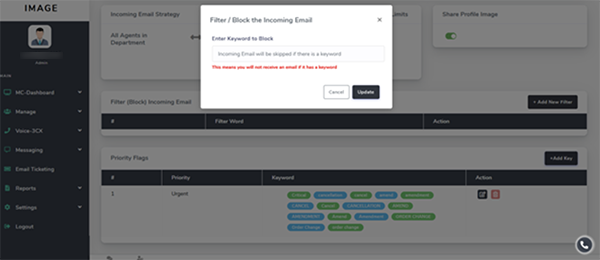
Add unwanted email addresses in the blocking list and any emails from these addresses are blocked from the system.
Priority Flag
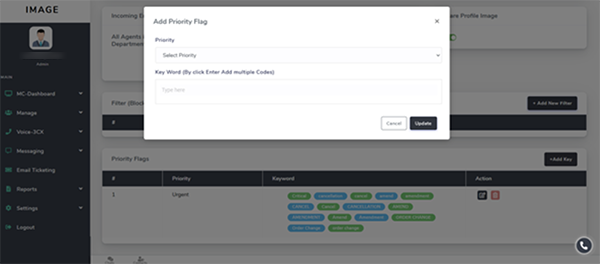
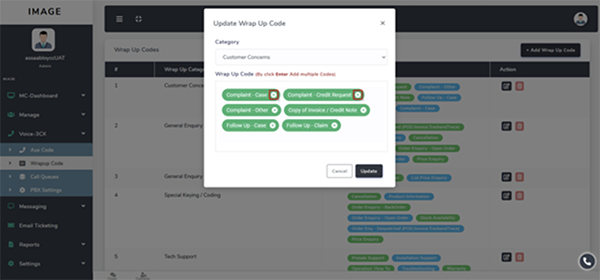
You can define a priority flag to be used in emails by typing the keyword and pressing enter (multiple attempts allowed), and then clicking update to complete the task.

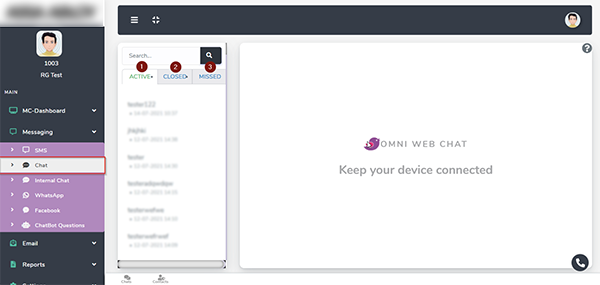
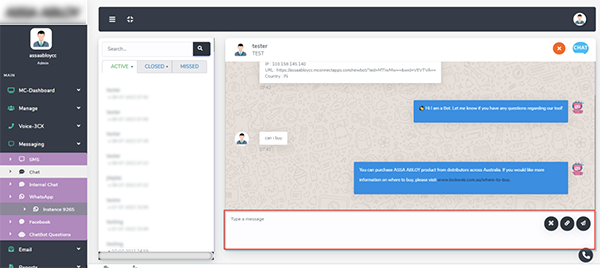
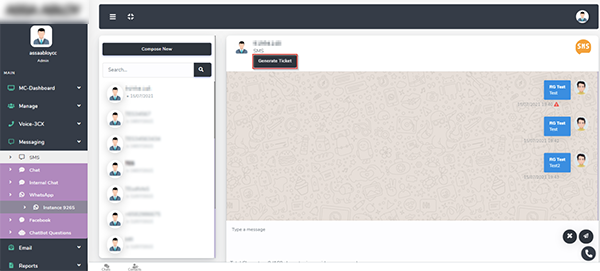
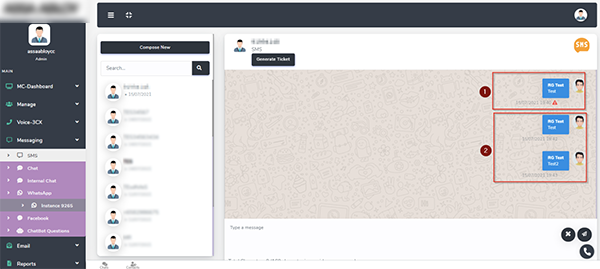
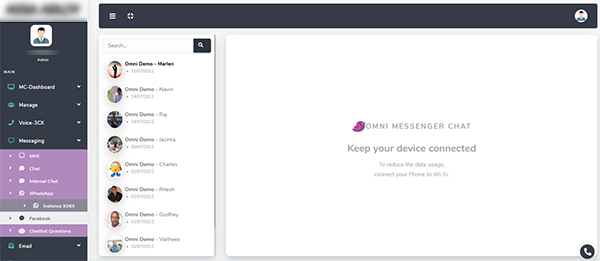
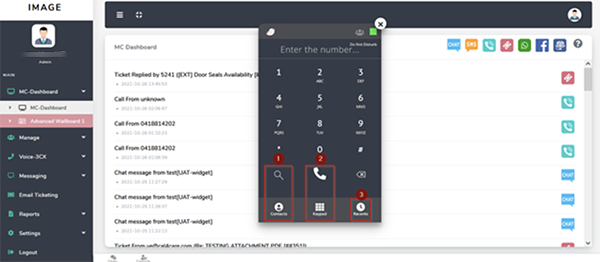
 Messaging > Chat
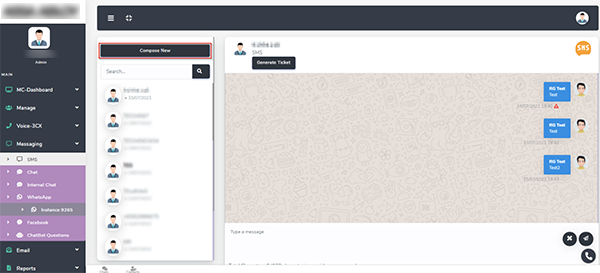
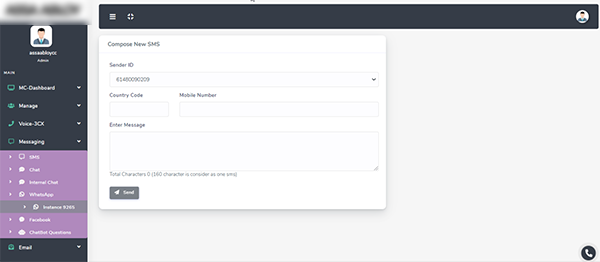
 Messaging > SMS
 Call > Recent
 Messaging > Facebook
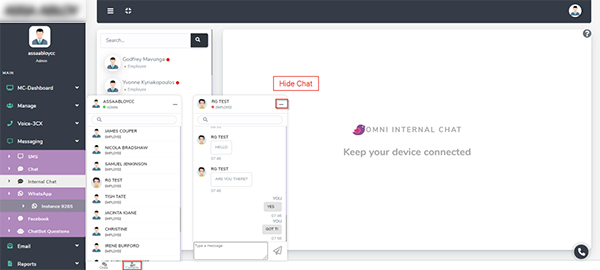
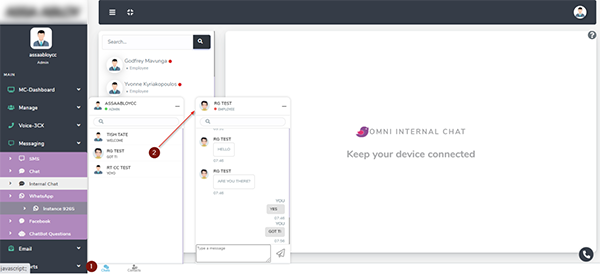
 Messaging > Internal Chat